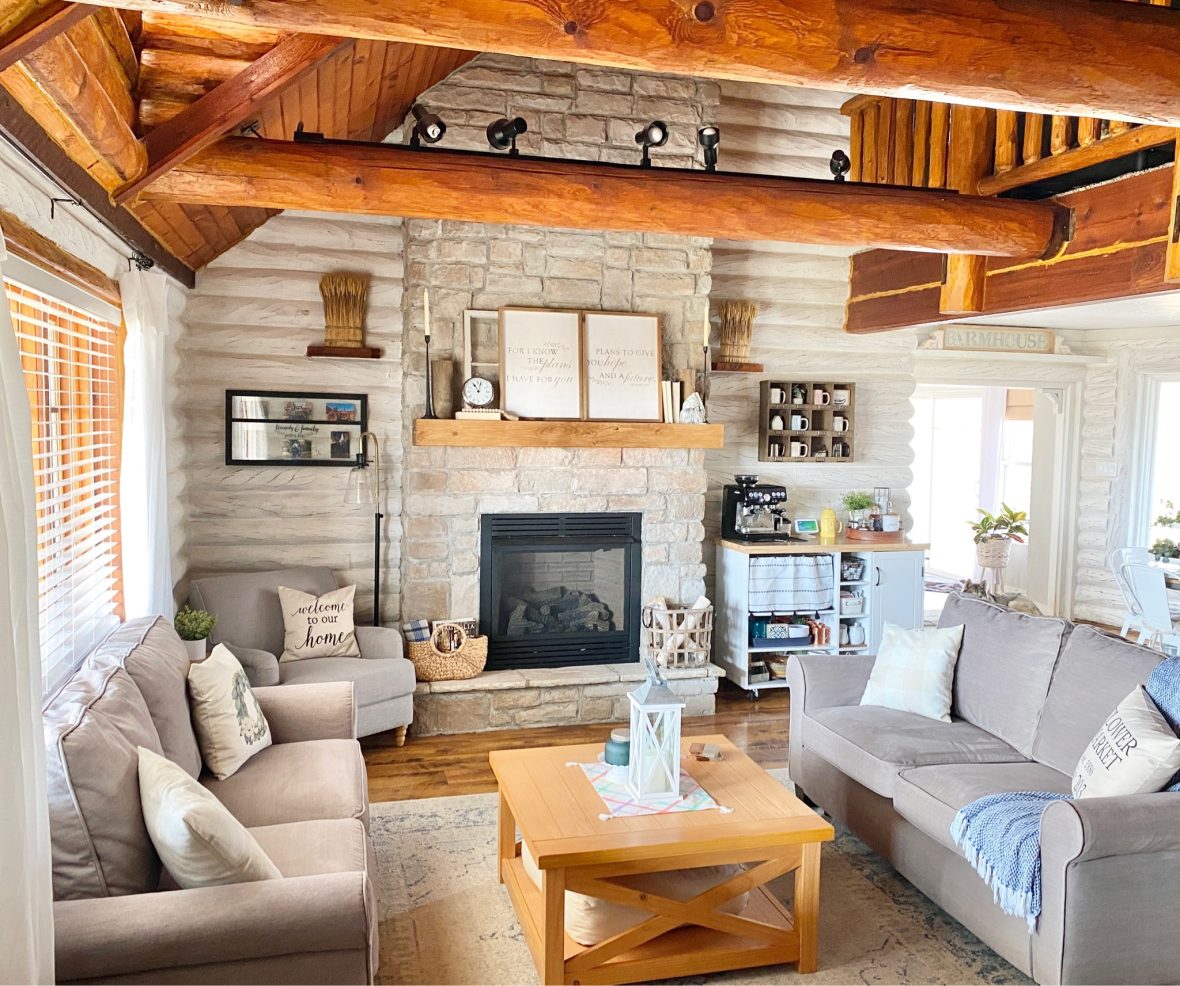

This past week I {finally} completed two projects I’ve been wanting to tackle for a while now.
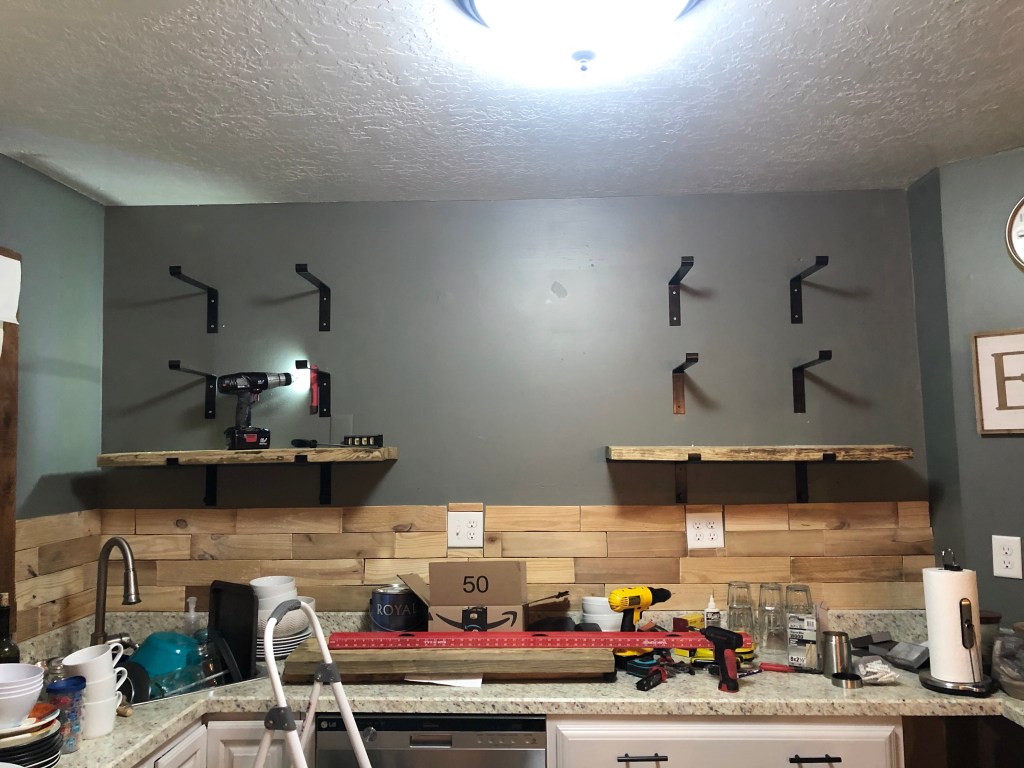
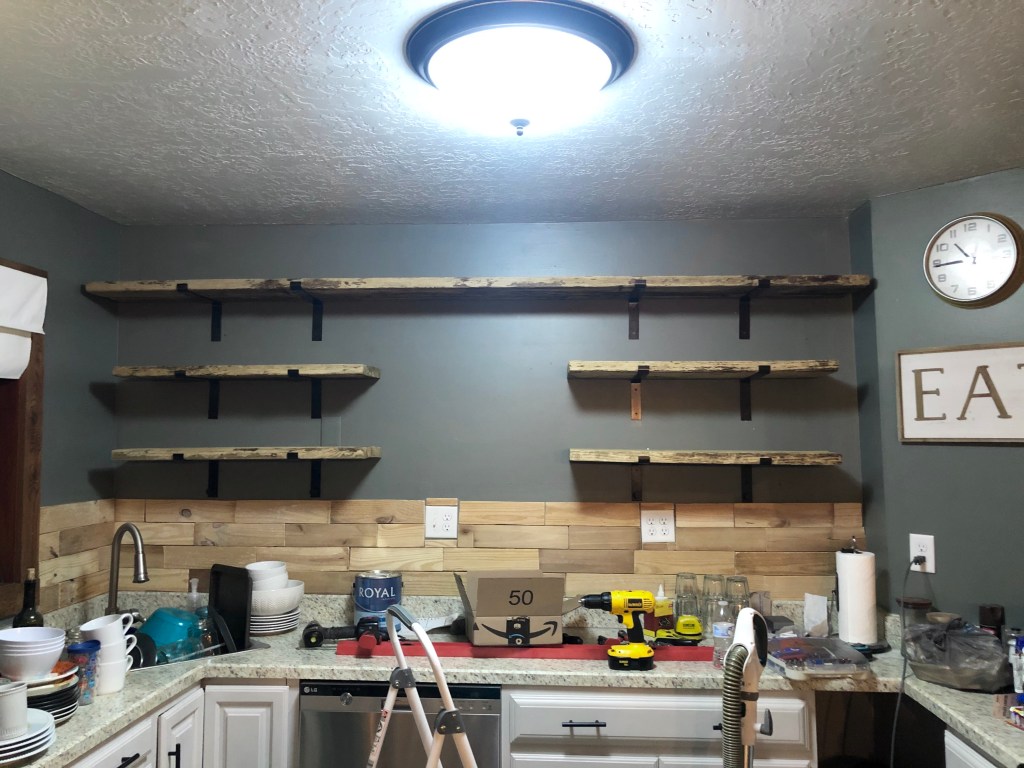
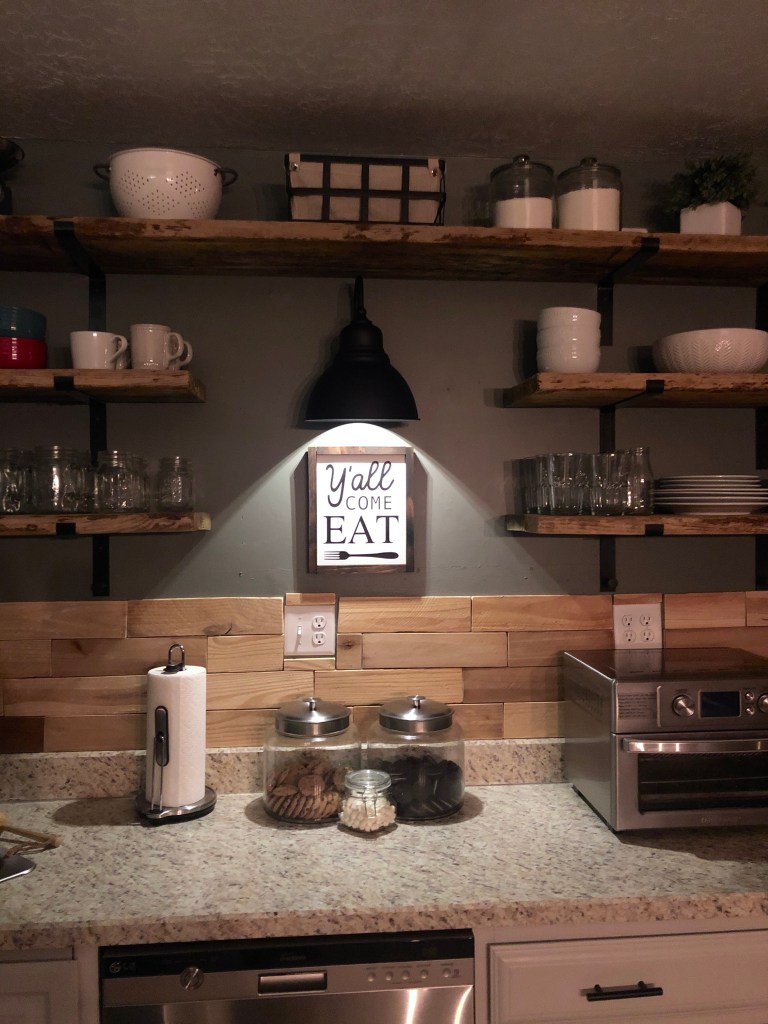
I hung a wired-turned-wireless wall sconce that still provides light(!) and, with an enormous amount of help from my husband, tore out the upper cabinets in our kitchen to replace them with open shelving. Only not in that order.
This is the first DIY I’ve done that I didn’t feel rushed to complete. It seems like the more projects I work through, the more patient I become with the process of DIYing. And with myself. Years ago, I’d only start something that I knew I could finish in a day or two, max. Needless to say, none of my DIYs were really conversation starters back then.

The most important material to have for any DIY project is patience. You will make mistakes. You will feel discouraged at times. And if you’re anything like me, you will absolutely ask yourself, “What was I thinking?” at least one or more times during every DIY.

There’s something about that feeling of accomplishment when you’ve finished a project. My favorite part of the process is designing but there’s nothing quite like seeing the end result in real life.. in 3D rather than as a 2 dimensional sketch or a vision in my head.
In order for a vision to feel complete, it’s imperative to understand that every single detail is just as important as another in the finished product. If any one aspect of the design is missing, it won’t quite feel whole.
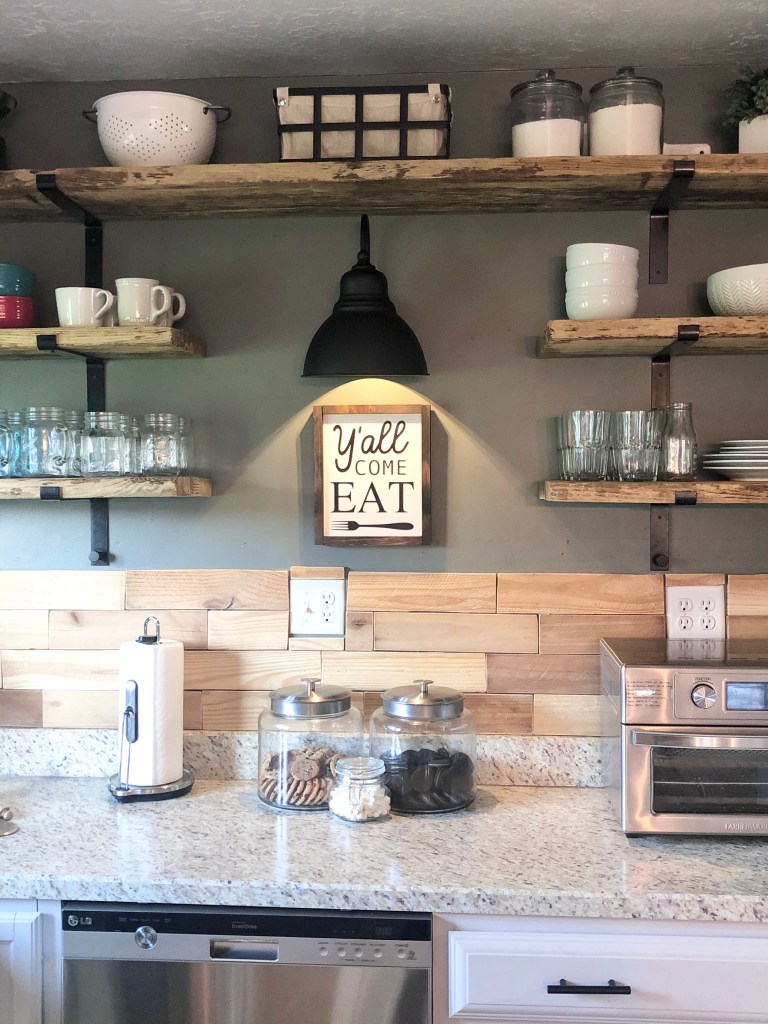
For instance, when our open shelving was complete something still seemed to be missing. My original design idea included a wall sconce – a working wall sconce. But other than an old, disconnected phone jack and aside from ripping open the drywall to add wiring for a light, I had to get creative.
(Click for link to brackets)
I’ve seen a few different hacks for using puck lights in wall sconces but for it to work in our kitchen I needed to tweak things a little. I wanted to be able to control the light with a remote so I wouldn’t need to drag out the step ladder every evening to turn on the light. That was easy enough since you can purchase remote controlled puck lights, but I also didn’t want to use adhesive velcro attached to the light socket area which I knew would eventually wear down and become problematic over time. Gluing the puck light in wasn’t an option either since I’d need to be able to replace the batteries which are only accessible through the back.

My solution for not using velcro or glue was to use this little item….
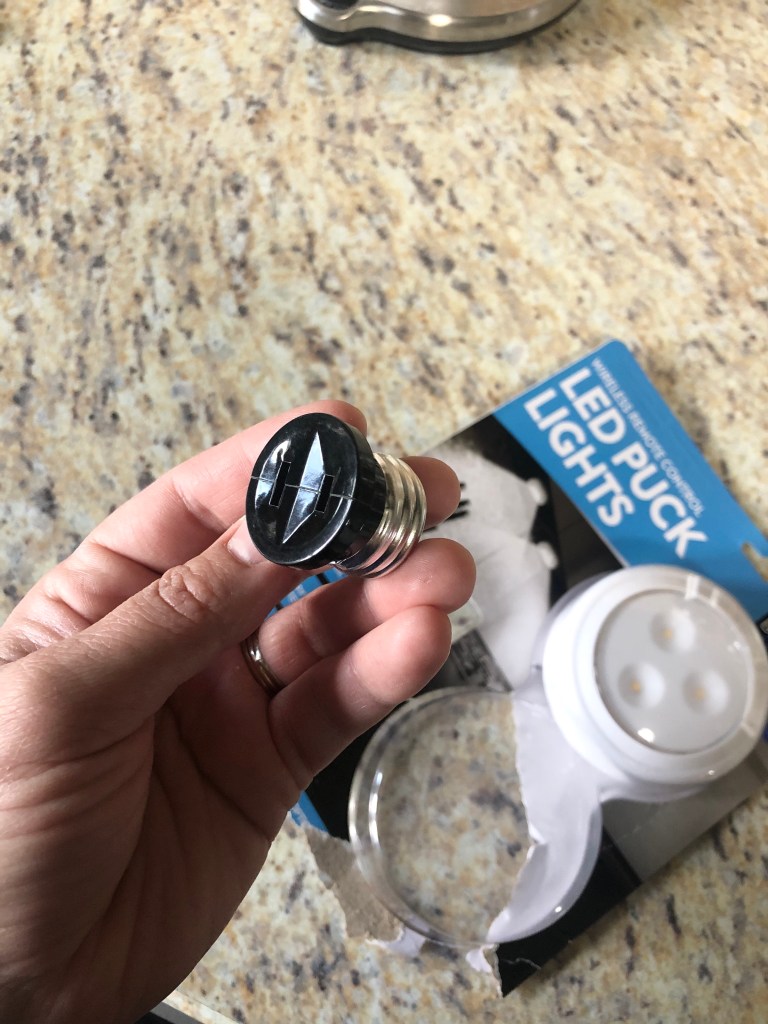
When used for its intended purpose, a lightbulb to outlet socket adapter transforms a traditional light socket into an outlet. However, all I needed it for was its body… haha.. meaning the “screw” part on one end and a {mostly} flat surface on the other.
The puck lights I ordered included a 3M adhesive patch for mounting. In my experience, 3M adhesive works better and longer than velcro or hot glue, which I’ve also seen some people use. Any of these will get the job done though, so it’s really a personal preference.
Here are the supplies and steps {which are super simple}:
Supplies
- Puck light with remote and 3M adhesive “patch” – more lumens will provide more light
- Lightbulb to outlet socket adapter
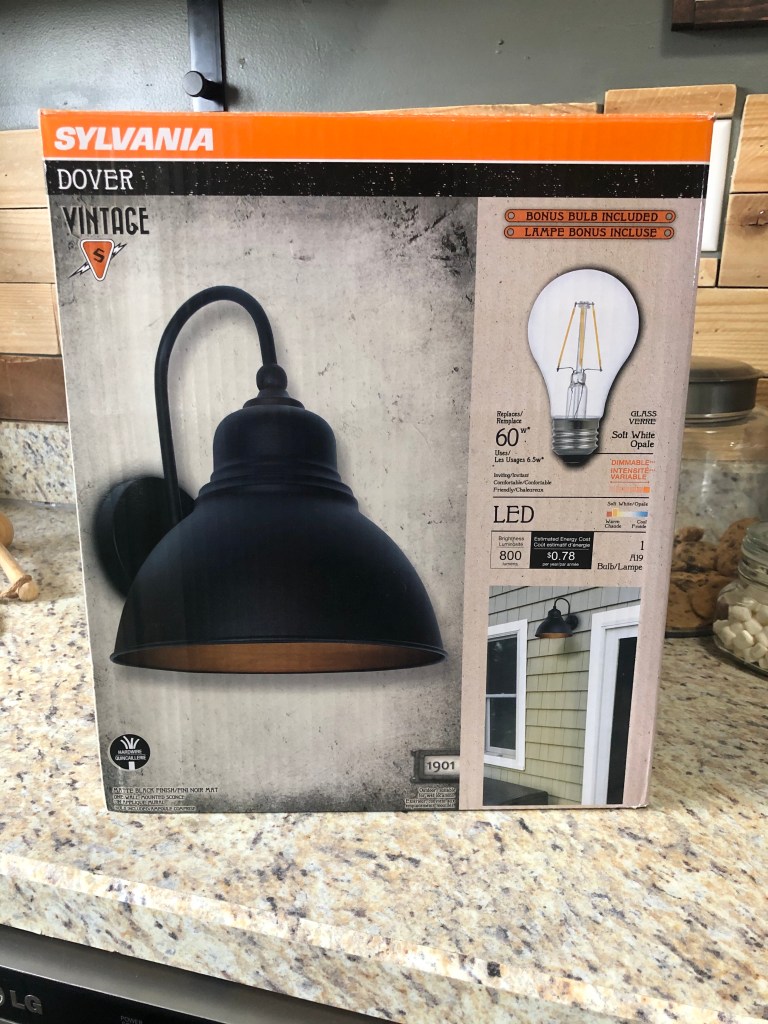
- Wall mounted sconce
Directions
- Open your puck light, insert batteries, close battery compartment and attach the 3M patch onto the back of the light.
- Firmly press the “flat” end of the lightbulb to outlet socket adapter onto the 3M patch.
- Once hung, screw the puck light into your wall sconce.
That’s it! Easy peasy, lemon squeezy.
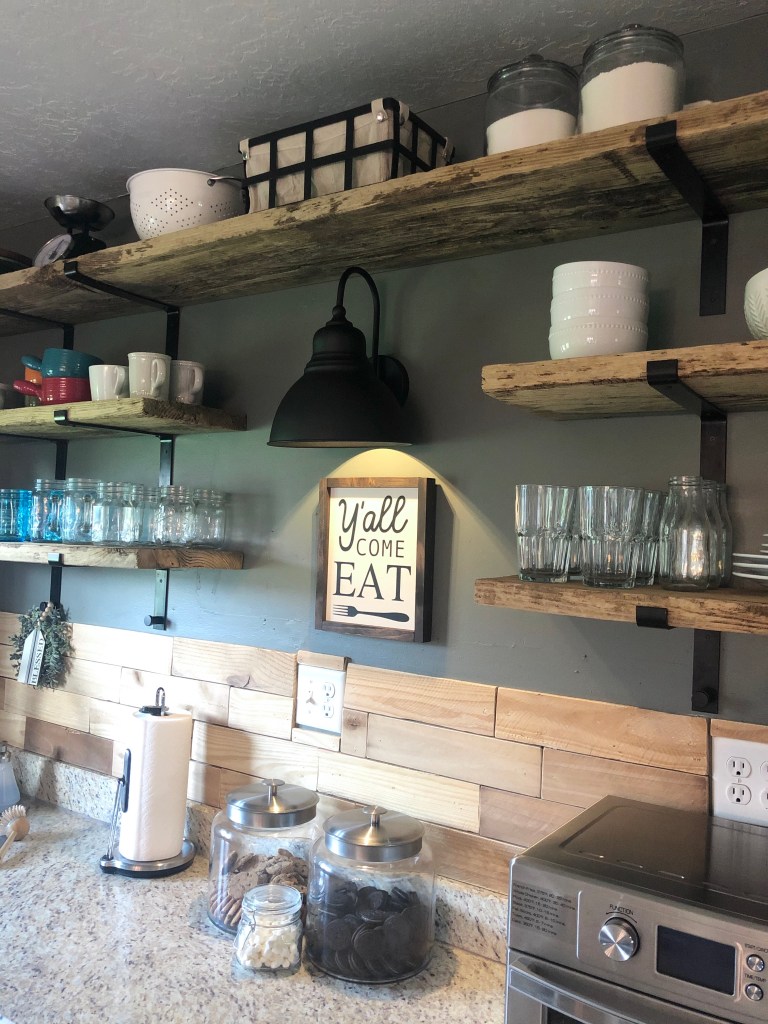
Then you can do what I did and use your remote to turn the light on and off about 10x in a row while giggling like a 5 year old. My poor husband worries about me sometimes.
Now go “let there be light” wherever your heart desires! 😉


2 thoughts on “DIY: Wireless Wall Sconce + Open Shelving”